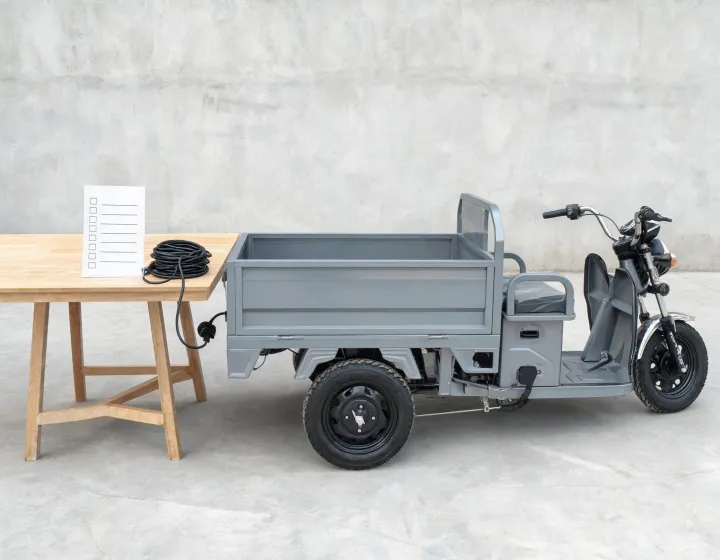
On the RadTrike 2023, a tight gap is settled by the rear wheels, not the handlebar, and the number that governs the pass is 5 mph (8 km/h), the speed ceiling the owner's manual puts on a turn. Everything below is bound to that model and its installed equipment, not to cargo trikes in general. If the opening has clear margin on both sides of the back wheels and the ground under it is flat and even, the rest of this is irrelevant: roll straight through and get on with the day.
The gap that bites is the one where a rear wheel is close to something hard and the rider is watching the front.
Why the Widest Part Isn't the Handlebar
The trike is significantly wider than most two-wheeled bikes, and the extra width lives at the back. That one fact rearranges what your eyes should be doing on approach. On a two-wheeler the bars and the wheel line sit close together, so a gap that clears the bars clears the wheels, which means you can aim with the front and let the rest follow. On this trike the two wheels that set the usable width sit behind the rider and outside easy view, so the part of the vehicle you cannot see is the part that decides whether the gap is passable. The manual points the same way: be aware of your surroundings and your wheelbase at all times, and mind the width of the back wheels.
That is not a beginner's note to be outgrown. A rider with a thousand miles on the trike still cannot feel the rear wheel edges the way they feel the bar in their hands, because a wheel hidden behind the seat sends nothing forward to the palms. Width you measure with your eyes beats width you try to remember.
Run the Same Checks in the Same Order Each Time
Order matters more than any single check, because each one is what makes the next usable. Secure and center the cargo first, since an off-center load puts more weight on one rear wheel and changes which wheel is carrying the trike through the turn. Get below the manual's 5 mph turn ceiling before the handlebar moves, since a trike still shedding speed mid-corner is a trike whose weight is still traveling forward. Keep off the throttle and pedals through the turn, since drive at the back is the last thing you want while you are placing the back. Track the rear wheel path rather than the front one, since the wheel you steer with is the one least likely to hit anything.
Run it as one motion. Approach the opening slower than feels necessary, cargo already settled and nothing loose on the deck. Pick the point on the far side where the two back wheels will land, not where the front wheel will. Give the bar one gentle input and hold it instead of making a series of corrections inside the gap. Once both rear wheels are clear, resume drive.
If you had to stop or shuffle inside the gap, you either arrived too fast or you aimed with the front wheel, and neither problem is fixed by gripping harder on the next attempt.
Below 5 mph Before the Handlebar Moves
Slow the trike below 5 mph (8 km/h) while turning, and the reason the number is attached to the turn rather than to the straight is geometry. A three-wheeler stays upright while its center of mass stays inside the triangle formed by the three contact patches. Turning is the moment the load shifts toward the outside wheel, so speed has to come off before the bar moves rather than while it moves.
There's no wiggle room here: the figure is a ceiling, not a target to creep up on.
Braking mid-corner costs you twice over: it pitches weight onto the single front wheel, and it removes the momentum that was keeping the back end settled. Better to arrive at the turn already slow than to fix the speed inside it.
Slow first, then turn — that's the whole trick, and it is the one part of the sequence that cannot be done late.
Hands Off the Throttle, Feet Off the Ground
Do not pedal or use the throttle while turning. Adding drive at the rear wheels mid-corner changes what the back of the trike does at exactly the moment you are steering that back end around an obstacle, which means throttle and gap management pull in opposite directions. The motor is not helping you place a wheel; it is moving the wheel you are trying to place.
Turn the handlebar gently, leaning slightly toward the turn to keep stability. The manual says gently rather than naming a number because a trike does not hold itself upright the way a rolling bicycle does: there is no self-correcting lean to fall back on, and the lean the manual asks for has to come from the rider's body. Take extra caution on uneven surfaces, where one rear wheel can drop or climb and tilt the whole triangle before you have time to answer it.
Never put your feet down while moving. A foot on the ground while the trike is still rolling puts a leg beside a rear wheel you cannot see, and that wheel is the one nearest your ankle.
Point the Rear Wheels at the Gap
With a long wheelbase, the rear wheels track inside the arc the front wheel draws, so lining the handlebar up with a gap is not the same act as lining the trike up with it. The check that matters is whether both rear wheels will clear, and seeing that requires looking back rather than forward.
Suppose a rider swings the front wheel neatly past the near jamb of a garage door and takes the far jamb with the outside rear wheel. Nothing about that pass felt wrong from the saddle, because the front wheel was clean the entire way and the contact came from a wheel the rider never saw. Treat that as a geometry illustration, not a report from a test ride, and take the lesson as one about aiming points.
So aim the back. Before you release the brake, look at the two edges of the opening and settle whether both rear wheels fit with room to spare, on a surface where neither will drop off an edge. Practice near objects until you understand how the rear wheel path behaves, because this geometry is easy to grasp on paper and hard to feel from the saddle.
If the trike is still being chosen rather than ridden, put the question to a supplier instead of guessing from a photograph: the width across the rear wheels, and where a centered load sits between them. A wider track buys stability and costs doorway clearance; a narrower one trades the other way.
Walking the Trike Through a Gap You Can't Ride
When the opening is too tight to ride through with confidence, walk it. Mind the width of the back wheels, and place one hand on the handlebar and the other on the seat back for stability as you go.
Walking keeps the same rear-wheel reference point and converts an all-or-nothing commitment into something you can stop and correct inch by inch. That is why it sits in the sequence for every rider rather than in a footnote for the first week: a gap you can ride through at the manual's turn speed is often a gap you can walk with more margin, and the walk costs half a minute.
Pay close attention to where the wheels are while walking the trike in tight spaces. A wheel that is merely close while you ride is a wheel that is genuinely against something while you push, and your own body now occupies space the trike needs.
How You Know You're Ready for a Real Gap
Practice turning and maneuvering in an open area, away from traffic, before you test any of this against a doorway that matters. The drill is simple to set up: in an empty lot, place two markers a little wider than the rear wheels and ride through without glancing down at the front wheel. This is a hypothetical drill rather than a documented test, so widen or narrow the marker spacing to match the routes you actually run.
What you are looking for is the rear wheels becoming the aiming point without a decision being made. If you still need to watch the front wheel to steer, the habit has not transferred and the open-area practice repeats. If you can roll through and know, before you look, that both back wheels are inside the markers, you have the skill a tight gap asks for.
Nothing here proves clearance in a specific doorway. Measuring the opening and looking at the back wheels settles that, and the trike's own width settles it before your skill does.
What the sequence buys is a trike you can put through a doorway without a spotter, at a pace where a mistake is a scuff rather than a hospital trip. What it costs is momentum. You give up the rolling speed a two-wheeler carries through a gap, and in exchange you get to stop, look at the back wheels, and correct or walk it. Riders whose routes are all open pavement pay that cost for nothing, right up until the first loading dock.

Leave a comment
Do not include confidential procurement data in a public comment. Use the inquiry form for sourcing requirements.