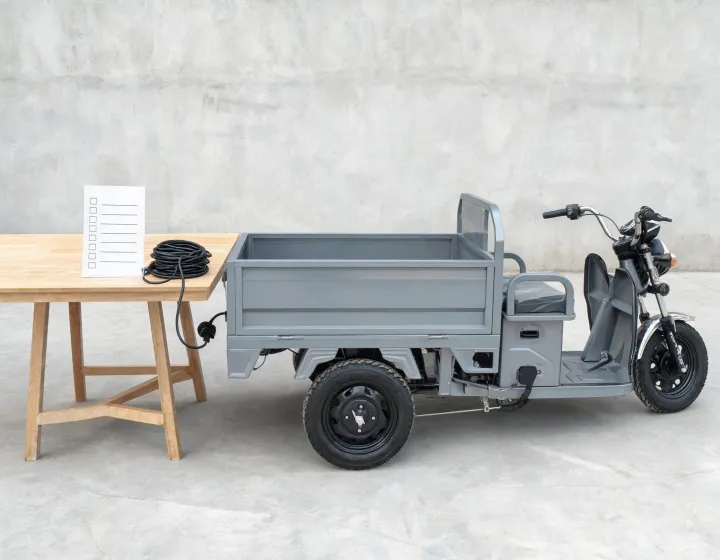
Can you just strap a load down and ride off? On the Rad Power Bikes RadTrike 2023, no. Securing cargo is a sequence: set the parking brake, keep a hand on the trike, place the load low, immobilize it, check clearance at the controls, the moving parts, and the ground, then recheck once it settles.
That order matters more than how hard you pull. A load that never shifts can still ruin your day if it sits high enough to eat your stability margin or reaches a lever, a wheel, or the pavement. The RadTrike owner's manual treats those as separate failures. So should you. Done right, a tight strap is the last step of the job, not the whole job.
Why a Cargo Trike Changes the Loading Job
The manual's caution is blunt: loading cargo on the trike can cause it to roll forward or backward or tip over, and that can mean damage or serious injury. Read what that sentence actually describes. It is a hazard that exists before any strap is tensioned. Adding mass moves where the trike's weight sits relative to its wheels, which means loading is a stability problem first and a knot problem second.
An empty trike feels planted when you stand next to it. That feeling is margin, not a guarantee. Load it and you spend margin: the same nudge from a curb, a road crown, or your own hand on the bed does more work because there is more mass sitting up there to move. The reason the manual leads with loading rather than with tie-downs comes down to order of operations. You cannot strap your way out of a bad starting position.
Set the Brake Before You Load
Before you lift anything, put the parking brake on and keep a hand on the trike. The manual says this for cargo being loaded or in place, and again for loading or unloading, so the risk window is the whole time the load is aboard, not just the second you set it down.
The reason is plain physics. A free-rolling wheel with mass arriving over it will move. Loading shifts weight forward or back, and on a slope or a soft shoulder the machine can roll out from under you. Holding on is not politeness. It is the second brake.
Ownership of the load is yours as well. The manual puts responsibility for securing loads, loose straps, and gear on the operator. Nothing in that sentence is shared with the dealer, the rack maker, or the strap brand. If a strap tail is flapping, that is yours to fix before you pull away.
What does it look like in practice? Park on the flattest ground you have, set the brake, stand on the load side with one hand on the frame or the bed rail, and only then lift. If you cannot hold the trike and lift at the same time, get help or split the load into two lighter trips. A half-loaded trike you control beats a full one you do not.
Keep Heavy Items Low in the Bed
The manual's placement rule is one line: load cargo as low as possible to keep the trike's center of gravity low and improve stability. That is the whole instruction, and it is worth understanding rather than memorizing.
Center of gravity is the point where all the mass acts — the trike, you, and the cargo together. Raise it and you lengthen the lever that any sideways force works through, which is the reason a tall stack tips while a flat one slides. Imagine the trike leaning: the higher the mass sits, the further it has to travel before the wheels can no longer catch it, which means a bump, a rut, or a sharp turn uses up more of your margin before you feel anything wrong. Straps do not change that at all. A perfectly tied load sitting at the top of the bed carries the full penalty until you take it off and set it lower. Heavy items belong on the floor of the bed, with light bulky things above or ahead of them where their mass costs less.
Heavy goes in first, on the floor.
Then build up around it. A low load also sits closer to the frame, so the tie-down points you can reach are shorter and more direct, which is one more reason the low option is the easy option.
Secure Against Movement, Not Just Tension
"Properly secured" is the phrase the manual uses, and it arrives with a checklist attached: nothing loosens, nothing risks interfering with moving parts, nothing risks touching or dragging on the ground. Read those three items and notice that none of them says tight.
The reason tension is not the test is that a strap resists only the direction it runs. A box held hard against the bed but free to pivot will find the slack in the system, usually through a soft item compressing, a hook creeping, or a knot settling. A drum-tight strap can coexist with a load that rotates on its own corner or walks sideways under vibration.
So build the securement to resist motion in more than one direction. Two straps pulling against each other, or one strap working against a solid edge, stop rotation in a way a single tight line cannot. A hard corner sitting near a moving part is a fail even when the strap reads tight.
Check the tails too. The manual lists loose straps separately from loads, which tells you the tail is treated as its own hazard rather than as untidy decoration.
Check Controls, Wheels, and Ground Clearance
How do you confirm the load is clear? Walk the trike and look at three lines: the controls, the moving parts, and the ground.
Controls come first, because that is where the worst outcome lives — cargo interfering with your control of the trike is the case the manual flags as capable of serious injury or death. Sit or stand in the riding position and work the bars through their full range. Anything that touches your hands, a lever, a cable, or the housing at full lock means the load moves, not the strap.
Moving parts next. The manual's periodic check covers anything that risks interfering with moving parts, so look at the wheels, the steering linkage, and anything that spins or swings once the trike is rolling. A strap end near a wheel is not a small thing at speed.
Ground clearance is the one people skip. A load or a strap tail that risks touching or dragging on the ground can catch on a curb cut, a ramp lip, or a pothole edge and pull the whole assembly with it. If it hangs below the bed line, shorten it or tie it up.
The manual says periodically and gives no interval, so there is no official number to hit. Set your own by conditions: the first check after the first stop, then again after anything that shakes the trike hard, such as railroad crossings, gravel, or a curb drop.
Practice With Light Cargo First
The manual's advice for a new operator is to practice with light cargo in a flat, open area before attempting heavier cargo, and especially before roads, hills, or wet conditions. That is a learning instruction, not a warning label, which is exactly why it gets skipped.
Suppose you take an empty lot, a few light boxes strapped low, and run figure-eights, braking, and one deliberate off-camber turn. What you are learning is not strapping, since you already did that, but how the trike answers when mass sits behind you and above the bed floor. A loaded trike steers and tracks differently, and you will feel it in the first firm stop rather than the tenth.
The reason wet pavement and hills get named is margin. A wet surface cuts the friction available at the tires, and a slope adds a steady push on the trike whether you asked for it or not. Both spend the same margin a shifting load spends. Stack all three — heavy load, hill, wet surface — and you have removed the room you would need to catch a slide.
For a fleet, this run is also the cheapest training available: one rider, one empty lot, one light load, before anyone touches a full payload.
Recheck After the Load Settles
A load that passed at the curb is not proven for the trip. The manual asks for periodic checks that nothing loosens or starts touching or dragging, and it names roads, hills, and wet conditions as the harder cases.
The reason is vibration plus settling. Straps stretch slightly, knots compact, cardboard crushes, and the load drops into the gap it just created. That is why a strap that felt firm at loading can be slack a mile later, not because you did it wrong but because the system redistributed. Rechecking is part of the method, not an admission that the first check failed.
Respect the boundary: the manual gives no time or distance interval, so do not invent one and do not treat a number as a guarantee. Pick a safe place to stop, such as a lot or a wide shoulder rather than the travel lane, and repeat the same three checks: tension, movement, clearance.
There is a real tradeoff. Rechecking costs time at every stop, and a route with many stops will feel it. The alternative is finding a slack strap at speed. The cheap version of the habit is a walk-around at the stops you were making anyway, not a special inspection trip.
Before your next load, start with the heaviest item and put it on the bed floor first. If it cannot sit low, split the load into two trips; that one decision does more for stability than any strap you can tighten.

Leave a comment
Do not include confidential procurement data in a public comment. Use the inquiry form for sourcing requirements.